Members
(constant) AppStudio Component Lifecycle
Each AppStudio component instance goes through a series of initialization steps — for example, the init phase performs data initialization, while the render phase mounts the component to the DOM and triggers re-rendering when data changes.
During these processes, the framework runs a set of lifecycle functions, allowing developers to insert their own custom logic at specific stages to gain finer control over the component’s behavior.
(constant) AppStudio Lifecycle Hooks Usage
For example, the onMounted hook can be used to run code after the component has finished the initial rendering and created the DOM nodes:
const button_1 = new TComponents.Button(null, {});

button_1.onMounted = () => {
  Logger.i('Hello world');
}

button_1.render();

// You can see the log message.
// [2025-xx-xxT06:33:54.361Z] [hello world]
(constant) Lifecycle Diagram
Below is a diagram for the instance lifecycle. You don't need to fully understand everything going on right now, but as you learn and build more, it will be a useful reference.
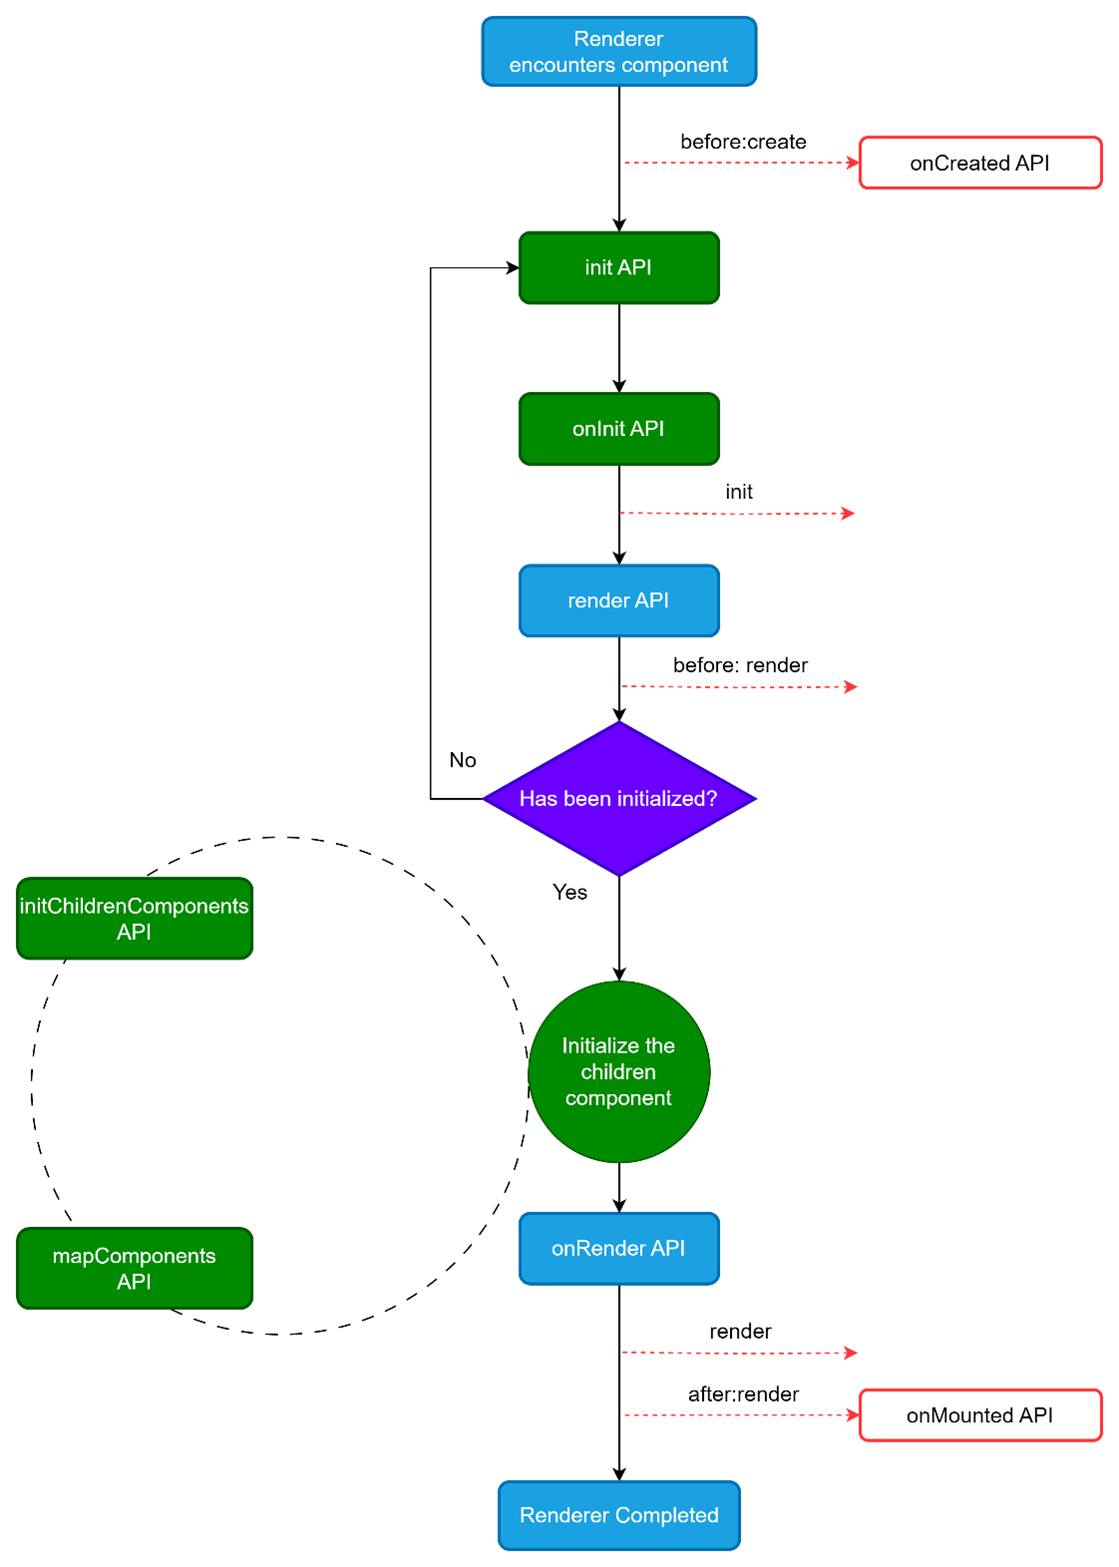
(constant) Lifecycle-based Deploy Sequence
Starting from AppStudio 1.2.0, a new option called Lifecycle-based deploy sequence has been added to the deployment process, as shown in the image below.
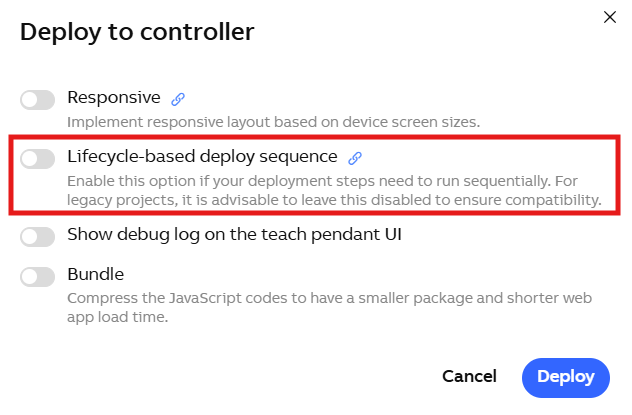
When this option is enabled, parent and child components in the project are refreshed (updated) sequentially based on their lifecycle. This mechanism is particularly effective for view-type components.
This setting impacts the loading behavior of view-container components (e.g., Tab, Multiview, Hamburger). Specifically, for non-visible views, child components will not trigger the onCreate or onMounted lifecycle hooks during project initialization.
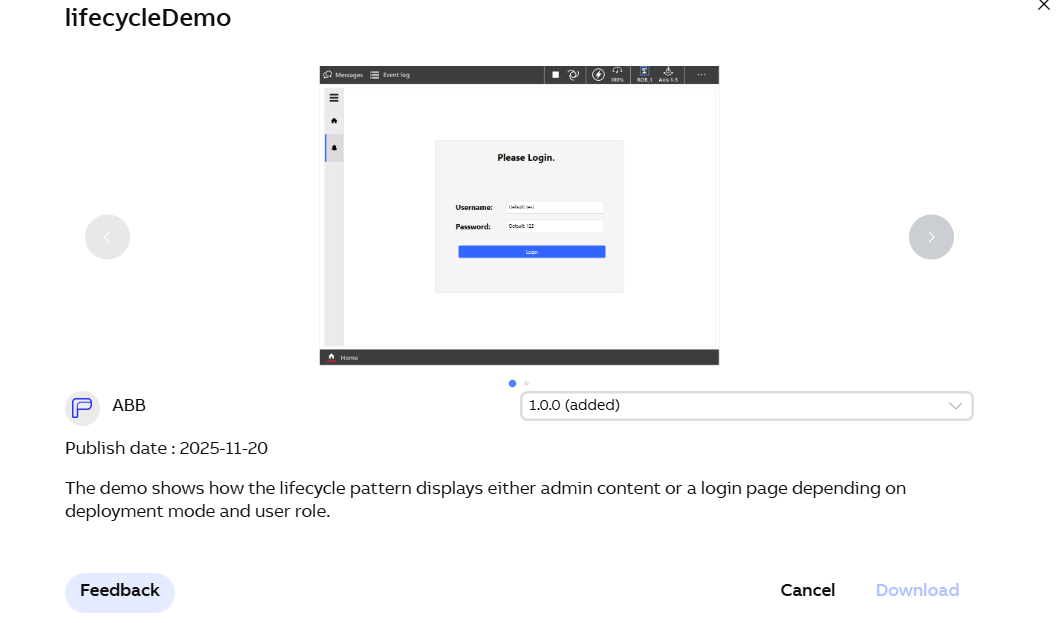
We provide a project template in the AppStudio cloud library for users to explore how the lifecycle-based deploy sequence affects project behavior.
You can download this template and create a project from it to observe the differences in usage and the impact of this deployment option.
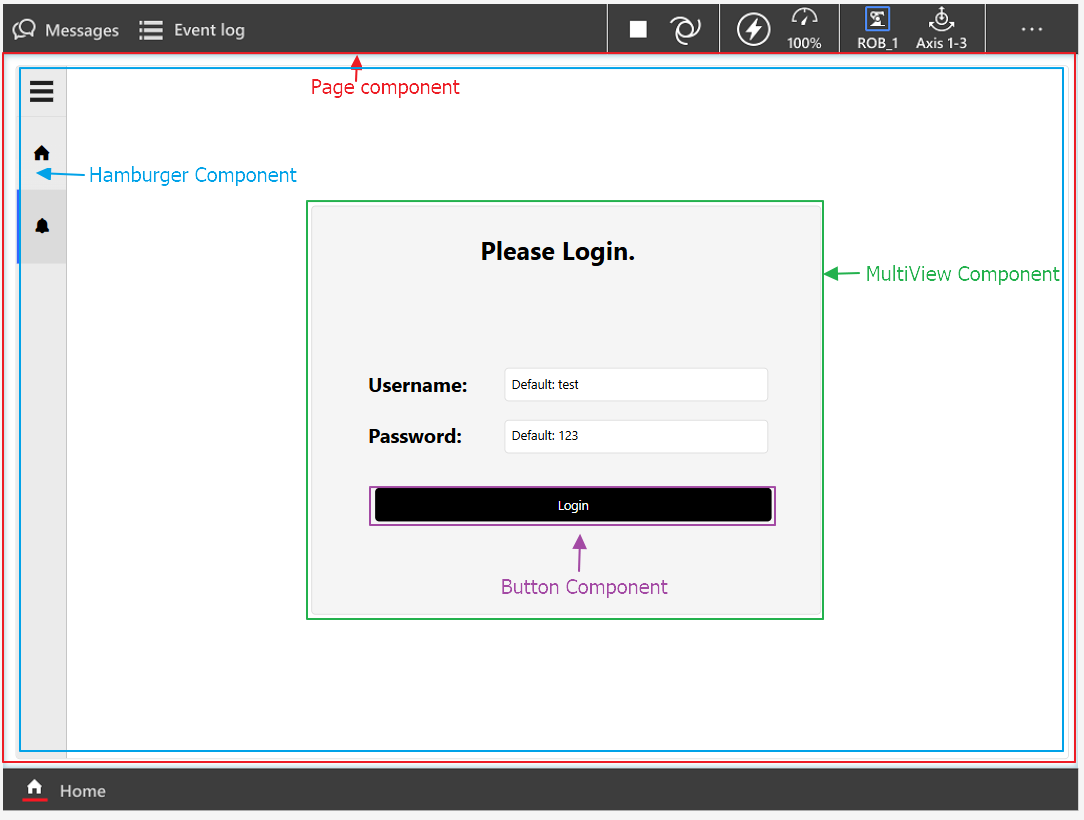
Next, we will explain the differences between these two modes. Here we use the components from the template project as an example. The component hierarchy of the project is shown in the diagram below:
- The page component contains the hamburger menu component
- The hamburger menu component contains the multiview component
- The multiview component contains a button component
The first page in the hamburger menu provides general informational content.
The second page in the hamburger menu displays different views depending on the user’s role:
- ⭐ If the project is deployed using the lifecycle pattern and the current user is an admin, clicking the second page will directly show the admin view, and you will see the following logs in the console.
Page created
Hamburger created
MultiView created
Login button created
Login button mounted
MultiView mounted
Hamburger mounted
Page mounted
From this log, we can see that the lifecycle-based deployment works as follows: the parent component is created first, followed by the creation of child components; once all create hooks are completed, the onMounted hooks of the child components are executed, and finally the onMounted hook of the parent component runs.
Please note that the Hamburger component features two distinct views. Initialization for components inside View II is deferred; child components will not execute until you click to activate View II.
- If the project is not deployed using the lifecycle pattern, clicking the second page will take the user to the login page first, and you will see the following logs in the console.
Login button created
MultiView created
Hamburger created
Page created
Login button mounted
Page mounted
MultiView mounted
Hamburger mounted
In non-lifecycle mode, the execution order of component create and mounted hooks can be somewhat random. In fact, they are executed in the order in which the components are declared within the mapComponents function in app.js.
(constant) Lifecycle-based Knowledge Limitations
There are certain behavioral constraints in the lifecycle mode that need to be clarified:
Lifecycle hook functions are triggered by events rather than being invoked automatically in a synchronous manner.
A hook function is triggered only once during the entire component lifecycle, Even if the component is destroyed and then re-rendered.
const button_1 = new TComponents.Button(null, {
    onCreated: function () {
        Logger.i('Created');
    },
    onMounted: function () {
        Logger.i('Mounted');
    }
});

// Print the onCreate and onMounted logs;
// These logs will only be printed once.
// [2025-xx-xxT11:17:02.659Z] [Created]
// [2025-xx-xxT11:17:02.660Z] [Mounted]
button_1.render();

// The onCreated and onMounted logs will not appear.
button_1.render();

// The onCreated and onMounted logs will not appear.
button_1.destroy();
button_1.render();
- Using asynchronous operations inside hook functions may disrupt the execution order of lifecycle hooks, so caution is advised.
- Calling asynchronous methods in a component’s onMounted and onCreated cannot guarantee that the results of the functions in onCreated will complete before onMounted.
const button_1 = new TComponents.Button(null, {
    onCreated: async function (){
        function sleep(ms) {
            return new Promise(resolve => setTimeout(resolve, ms));
        }
        await sleep(2000);
        Logger.i('Created');
    },
    onMounted: async function() {
        Logger.i('Mounted');
    }
});

button_1.render();

// Checking the logs
// the print statements from `onMounted` predate those from `onCreated`.
// [2025-xx-xxT11:25:33.738Z] [Mounted]
// [2025-xx-xxT11:25:35.962Z] [Created]
In components with an HTML parent-child structure, if asynchronous methods are written in onMounted and onCreated for initialization or rendering, there is no guarantee that parent and child components will complete initialization or rendering strictly according to the lifecycle sequence.
Regarding this point, users can download the lifecycleDemo 1.0.0 template and deploy it with the second page of the Hamburger Menu set as the activeView. At this point, it can be observed that the multiView component renders before the Hamburger Menu component checks the user role in onCreated. As a result, even if the user is an administrator, the active view of multiView still displays the first page, which is the login screen.